
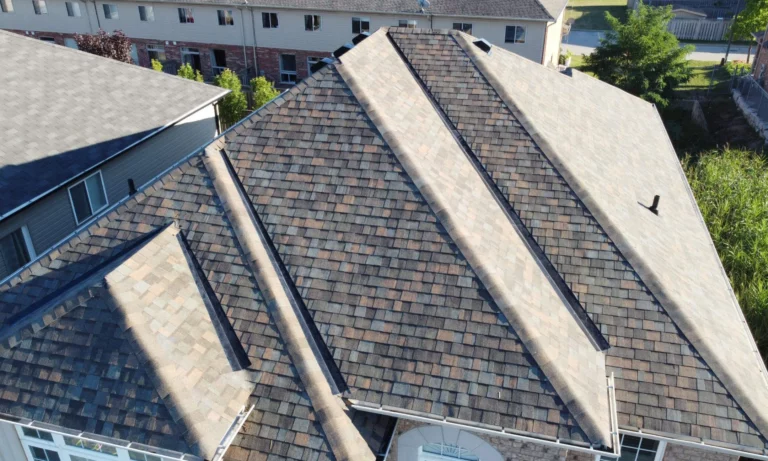
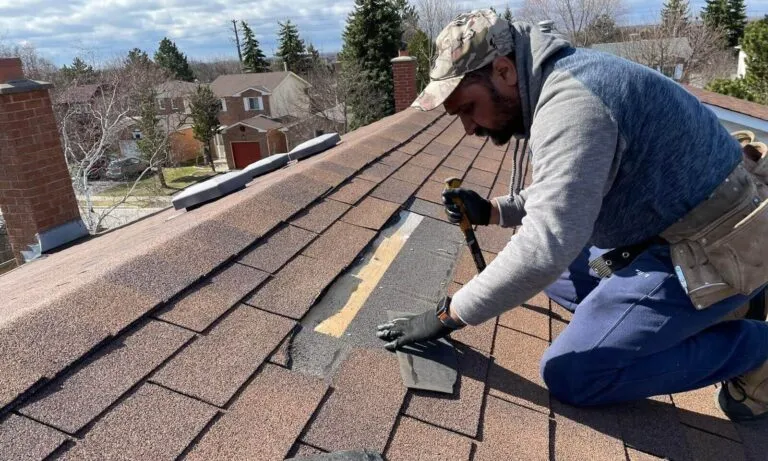
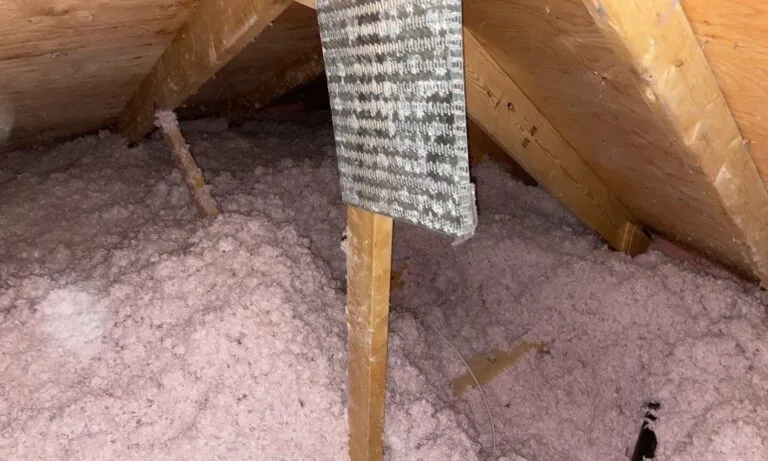

 Steven D'SouzaMarch 14, 2024.I had contacted Real blue roofing Service to do insulation in the attic and install two washroom vents on my roof. The Real blue team who came were very Professional, and first thing explained to me what they were doing. So they first removed all the old insulation, installed two vents and plus two extra vents on the roof. They worked very hard with no water break or lunch break and on the way they took pictures of before and after. Also after the job completed they vacuumed the full area including the carpet on the stairs and left our very clean. Mr. Dill Singh all hats off for a superb job your team did at our place. This is the second time I have used this company, many years back they installed a new roof, and when I saw them in this new business and expansion I right away call them no doubt I had some more estimates from different Attic companies. If any one needs a roof replaced or attic take care they are the people you need to contact. I strongly recommend this company Real Blue Roofing Services for any work, their pricing is very reasonable and take the liberty to explain the full estimate and what needs to be done. Once again Mr. Dill Singh and your team who you deployed I don't know their names I personally thank you for their hard work (specially the guy who was in the attic doing the job). they worked very diligently, with no water breaks or lunch break in between, you very rarely find such honest, hard working and diligent workers. Please thank your crew on our behalf. This is why I gave them 5 stars, I could talk a lot about this company, but right now I say eyes closed if you need something done please don't hesitate to contact Real Blue Roofing Services. I would had pictures but I have not received them.Kevin BlackJanuary 22, 2024.Service was prompt, convenient and good quality work. No complaints at all!Marta DemjenDecember 1, 2023.I thank you for your amazing service. It is almost a miracle today to receive such a good and reliable service. Quick response to when I called, thorough investigation of the problems, the repair is done perfectly and fast. And for me also very important the honest, respectful communication, a feeling of trust that is hard to find. I will never take my business elsewhere. Thank you Deepak and your team!!!Hars SinghNovember 26, 2023.Very professional and organizedVishal MehndirattaNovember 13, 2023.Showed up as promised. Efficient service and reasonable pricing.Paal WirringNovember 7, 2023.They did great job with changing my shingles.They were professional, quality workmanship and responsible.I will be recommending them. 👏👏Dibyashowry KhanalNovember 5, 2023.—-Amanda FruciOctober 22, 2023.Working with Real Blue was a wonderful experience! They were very responsible to our questions, the coordination was seamless and they were in and out in 1 day. Highly recommend them for your roofing needs.