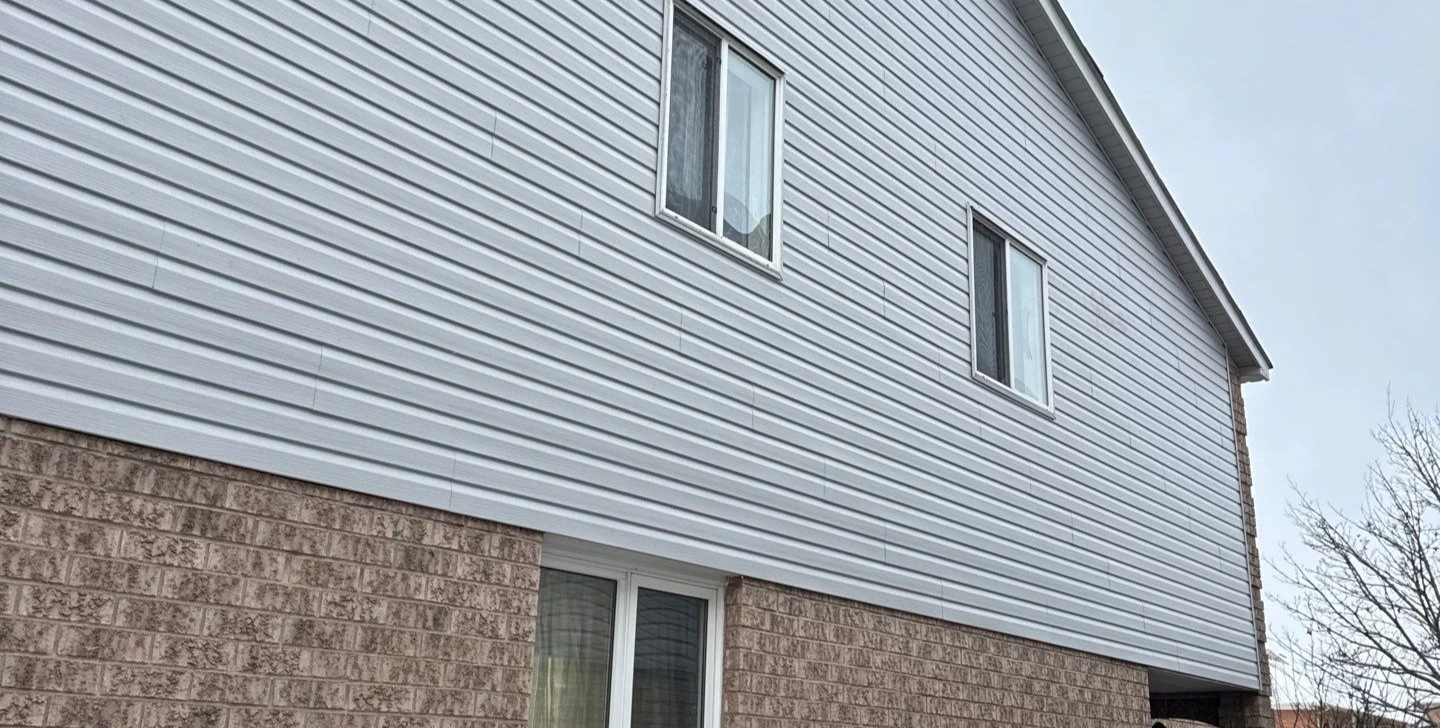


Replacing old siding is more than changing the look of a home. Before new siding is installed, it is important to check the wall underneath and make sure the exterior is in good condition.
In this residential siding project, our team completely removed the old siding and installed new premium Kaycan siding. We also removed the old soffits and fascia and installed new soffits and fascia as part of the exterior upgrade. During the work, we found uneven areas in the wall structure and some rotten plywood underneath the old siding.
We repaired the damaged plywood, prepared the exterior properly, installed the required underlayment, and then installed the new siding, soffits, and fascia.
This project shows why proper preparation is an important part of a complete siding replacement.
This was a complete exterior siding replacement for a residential home.
The project included:
The goal was to give the home a fresh new look while making sure the surface underneath the new siding was properly prepared.
We started by carefully removing the existing siding from the home.
We also removed the old soffits and fascia that were part of the existing exterior. Removing the old exterior materials gave us a chance to see the condition of the wall underneath.
This is an important step because problems behind old siding are not always visible from the outside.
After removing the old siding, we removed the existing soffits and fascia from the home. Removing these old exterior materials allowed us to properly inspect the areas around the roofline and edges of the home.
It also prepared these areas for the installation of the new soffits and fascia later in the project.
After the old siding was removed, we inspected the exposed wall.
We found that some areas of the structure were uneven. We also found sections of plywood that had become rotten. These problems needed to be addressed before installing the new siding.
Instead of covering the damaged areas, we repaired them first.
The damaged plywood was removed from the affected areas. We then installed new plywood where it was needed.
This provided a clean and solid surface for the next stage of the project. Taking care of damaged materials before installing new siding is an important part of a proper siding replacement.
Once the plywood repairs were complete, we prepared the exterior for the new siding. The wall surface was checked and prepared before moving to the siding installation.
We also installed the appropriate underlayment as part of the exterior preparation. Proper preparation helps create a better base for the new siding and adds another layer to the exterior wall system.
After the exterior was properly prepared, we began installing the new premium Kaycan siding.
Each section was installed carefully to create clean lines and a consistent finish across the home.
We paid attention to areas such as corners, edges, openings, and other finishing details.
The new siding gave the home a fresh and updated appearance.
After the exterior was properly prepared, our team installed the new soffits and fascia.
Soffits and fascia are important parts of the home’s exterior and help complete the roofline and edges of the home. We installed the new soffits and fascia carefully to create a clean and finished appearance around the home. This work also helped give the exterior a fresh and updated look before completing the siding installation.
After the main siding, soffit, and fascia installation was completed, we checked the finished exterior.
We looked at the siding lines, corners, edges, openings, soffits, fascia, and other finishing details to make sure everything was properly completed. The result was a completely refreshed exterior with new premium Kaycan siding, new soffits, and new fascia installed over a repaired and properly prepared surface.
When homeowners look at their siding, they usually see the outside finish. But there is much more behind it.
The soffits and fascia are also important parts of the home’s exterior and should be checked when completing a larger exterior replacement.
When old siding is removed, roofers may find:
This is why a complete siding replacement should include an inspection of the surface underneath. Installing new siding over damaged materials may leave an existing problem behind the new exterior.
In this project, we were able to find these issues because the old siding was completely removed before the new siding was installed.
New siding can completely change the appearance of a home. But a good siding project should also focus on what is underneath the siding.
A proper process includes:
Remove → Inspect → Repair → Prepare → Install → Inspect
As part of this project, our team also removed the old soffits and fascia and installed new ones after the siding installation was completed.
Following these steps helps create a better foundation for the new siding and exterior materials.
We work with homeowners looking for siding replacement and new siding installation in communities across the Greater Toronto Area and surrounding areas.
Our team can also help with soffit and fascia replacement as part of a complete exterior project.
Our service areas include:
Every home is different. Some siding projects may only require new siding, while others may uncover damaged plywood, old soffits, damaged fascia, or other issues that need to be repaired first.
That is why inspecting the exterior before installing new siding is so important.
If your home’s siding is old, damaged, faded, loose, or showing signs of wear, it may be time to have it inspected.
Our team can help with the complete siding replacement process, from removing the old siding and checking the wall underneath to repairing damaged areas, preparing the exterior, installing new siding, and installing new soffits and fascia. If you are planning a siding replacement or new siding installation, contact our team to discuss your project.
A new exterior starts with proper preparation.
Cracked, loose, faded, damaged, or worn siding can be signs that your home may need siding repair or replacement. An inspection can help determine the condition of the siding and the wall underneath.
Once old siding is removed, contractors may find rotten plywood, moisture damage, uneven areas, or other materials that need repair.
Damaged or rotten plywood should be properly assessed and repaired before new siding is installed. This helps provide a better surface for the new siding.
Soffits and fascia are important parts of the home’s exterior. They help complete the roofline and edges of the home and contribute to the finished appearance of the exterior.
Damaged, rotting, loose, or worn soffits and fascia may need repair or replacement. An inspection can help determine their condition.
Underlayment is part of the exterior wall preparation. The right underlayment can help provide an additional layer to the exterior wall system.
In some situations, siding may be installed over an existing surface, depending on the home’s condition and the type of siding. However, removing the old siding can allow the wall underneath to be properly inspected for damage.
The time required depends on the size of the home, the condition of the existing siding, repairs needed underneath, the siding material, and other project details.
The wall underneath may have damage that cannot be seen from outside. Inspecting it before installation gives the contractor a chance to find and repair problems before they are covered by the new siding.
A siding replacement is not only about changing the colour or appearance of a home. The condition of the surface underneath also matters.
In this project, removing the old siding allowed our team to find rotten plywood and uneven areas that needed attention. We also removed the old soffits and fascia before installing new ones after the siding installation. After making the necessary repairs and preparing the exterior, we installed new premium Kaycan siding, followed by the new soffits and fascia.
The result was a fresh new exterior with new siding, soffits, and fascia built on a properly prepared surface.
Good siding installation starts with good preparation.

Real Blue Roofing Services Inc
647 740 5225
8890 Heritage Road Brampton
437 826 5225
2255 Dundas St W Mississauga
Real Blue Roofing Services Inc
647 740 5225
8890 Heritage Road Brampton
437 826 5225
2255 Dundas St W Mississauga
Real Blue Roofing Services Inc
647 740 5225
8890 Heritage Road Brampton
437 826 5225
2255 Dundas St W Mississauga
Website and SEO managed by
Blu Up Media Inc.